The blog post is continually updated. Currently I redesign the PCB design and layout.
My father has a analog model train in N size. In the based he used the default controls. Everything was working fine, but with time more and more signals and other elements are added. Now the analog control is no more simple and a big bundle of wires needed and routed to the control panel.
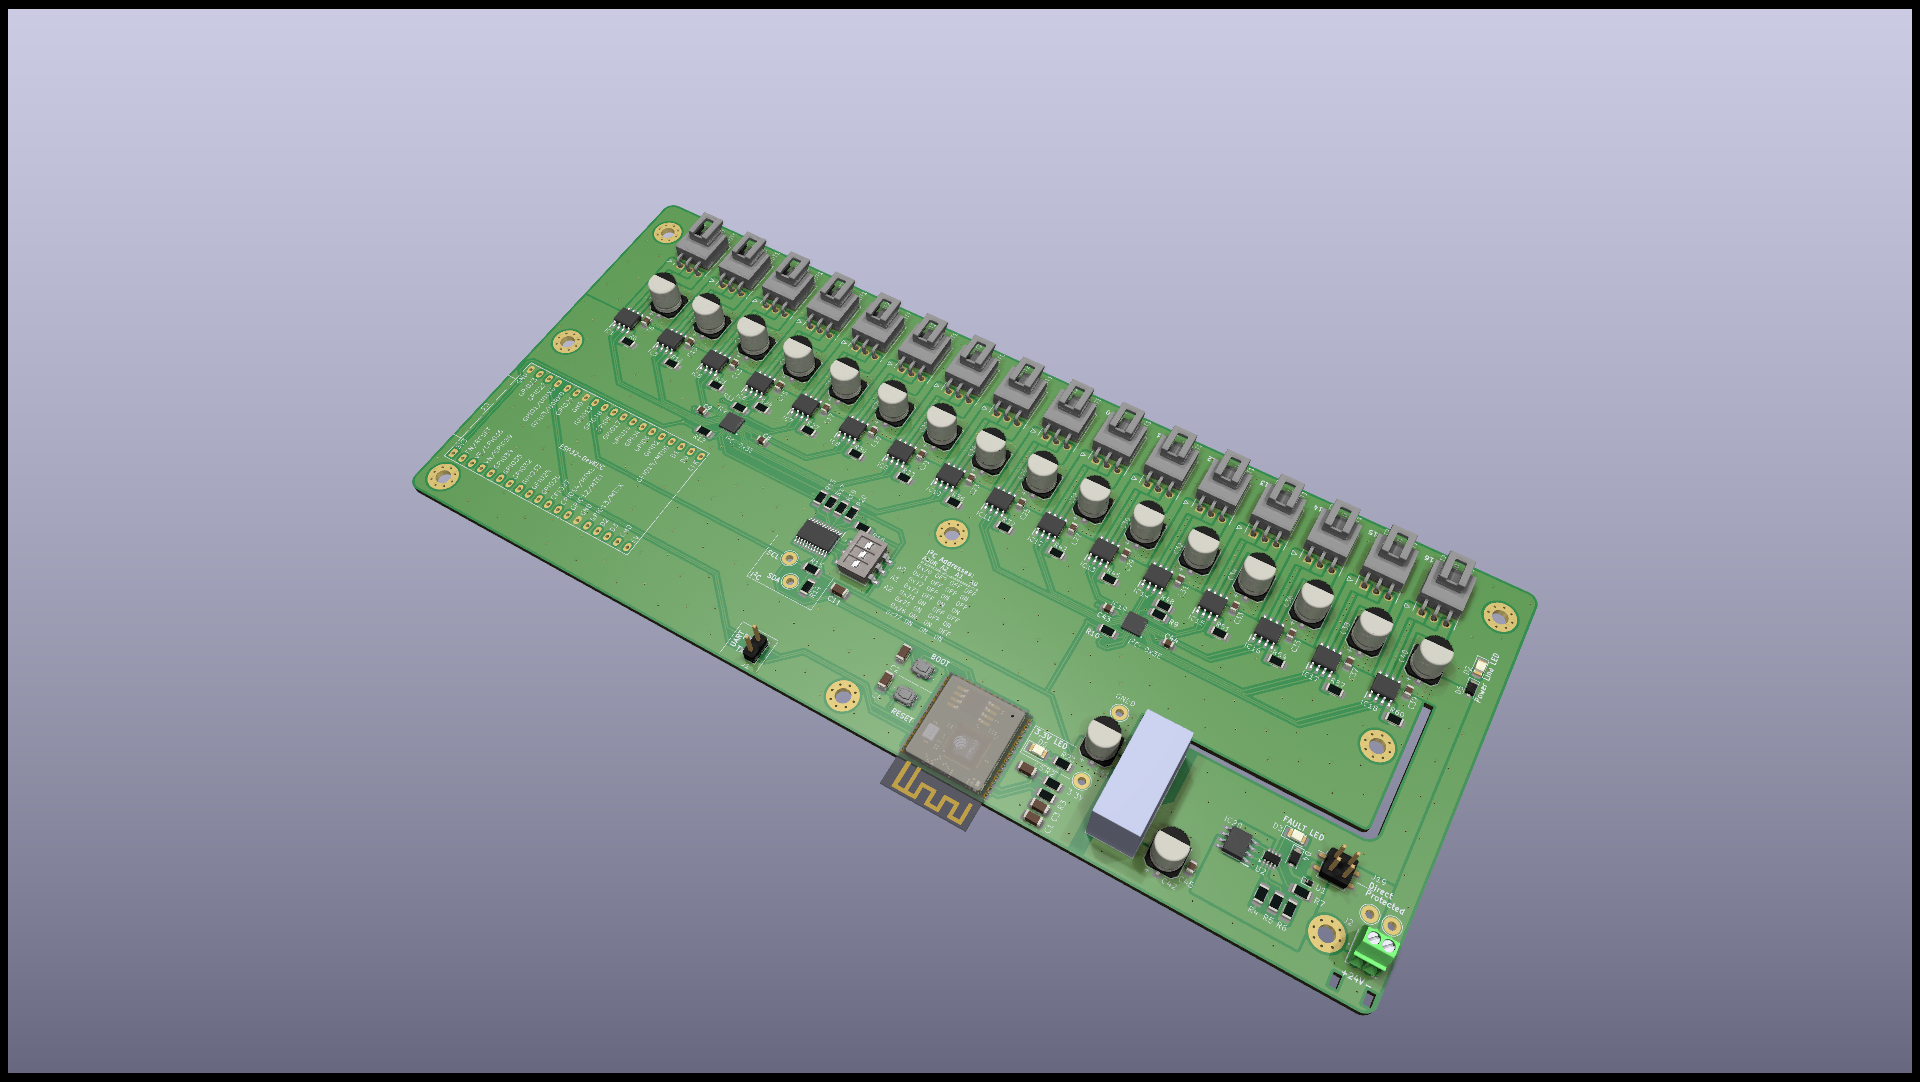
At this point, I started to create a hybrid solution for the analog model train. The switches, power lines and so on are analog. But controlled by ESP32 micro controllers. This ESP32 a flashed with ESPHome and communicate with a Home Assistant instance. For more security, I moved the ESP32 micro controller and the Home Assistant instance in a own VLAN. But this is not part of this story.
The base voltage of the board is 24V DC, with a limit of 36V DC. On the board is also a DC-to-DC converter with a fixed output voltage of 3,3V. So no external power supply for the ESP or the I²C chips are needed. Via ESPHome the 16 H-Bridges are controlled and used for different features.
The PCB base board is stackable up to 64 boards, with one board is the master with the ESP32. Every board has a unique I²C address, thank to the I²C multiplexer TCA9548APWR.
Features
- 16 H-Bridges via DRV8871DDA
- Voltage limitation for every HBridge – via a internal h-bridge component of ESPHome an some scripts.
- Supported modes with ESPHome templates:
- Switch mode – Only output OUT1 and GND is used. The device type is switch for Home Assistant.
- Power line – Only output OUT1 and OUT2 is used for the control of the model train power. The device type is fan for Home Assistant, with some custom icons.
- Signal – Internal it is using the switch mode. The device type is light for Home Assistant.
- Light – Internal it is using the switch mode. The device type is light for Home Assistant.
- Uncoupler – Internal it is using the switch mode.
ToDo
- Make it modulare
- Replace components with cheaper
- Add alternative components and variants
Updates
Update 2024.06.02:
I started to create some sub modules, for easy reuse in other projects. They are soldable directly to a pcb or usable on breakout boards (header pin holes in a matrix of 2,54 mm).
References: